Indoor playground safety checklist for every day
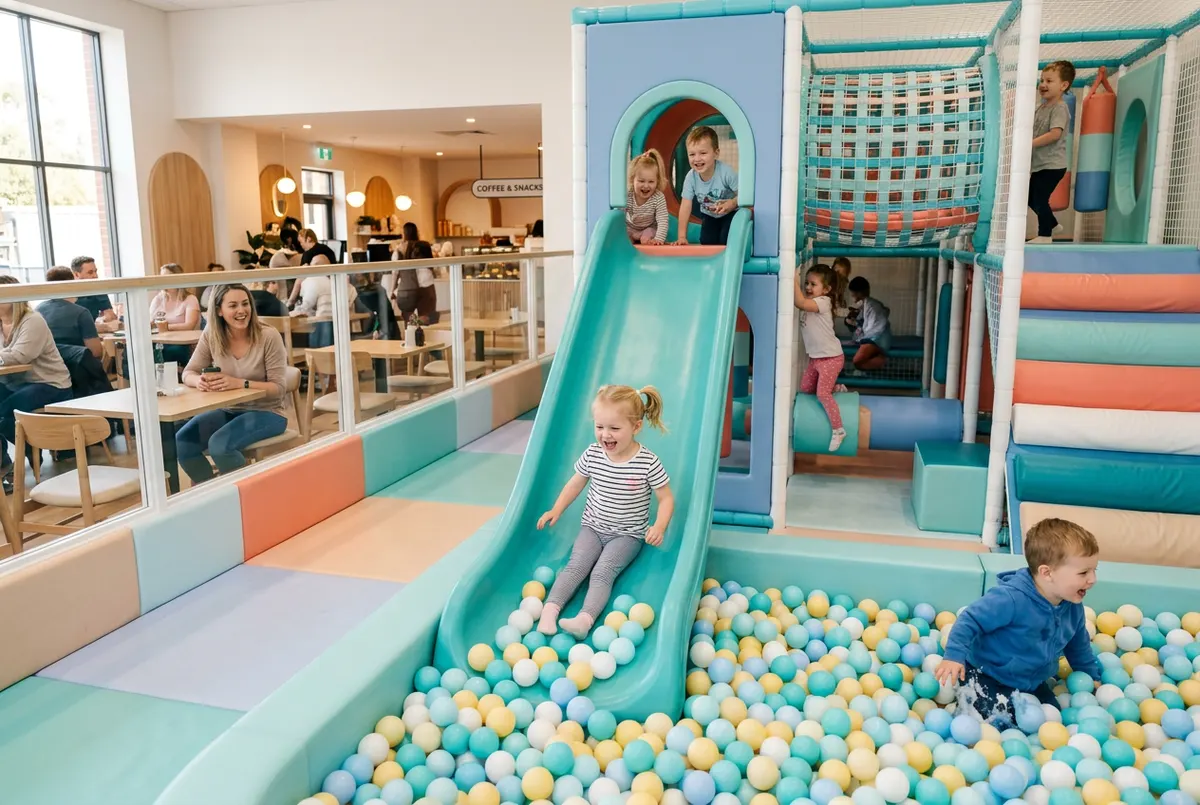
An indoor playground safety checklist is a short list of checks that a named member of staff carries out every day before opening, during opening hours and at closing, then signs with the date and time. It catches torn netting, loose padding or blocked exits early, and shows afterwards exactly what was checked and by whom.
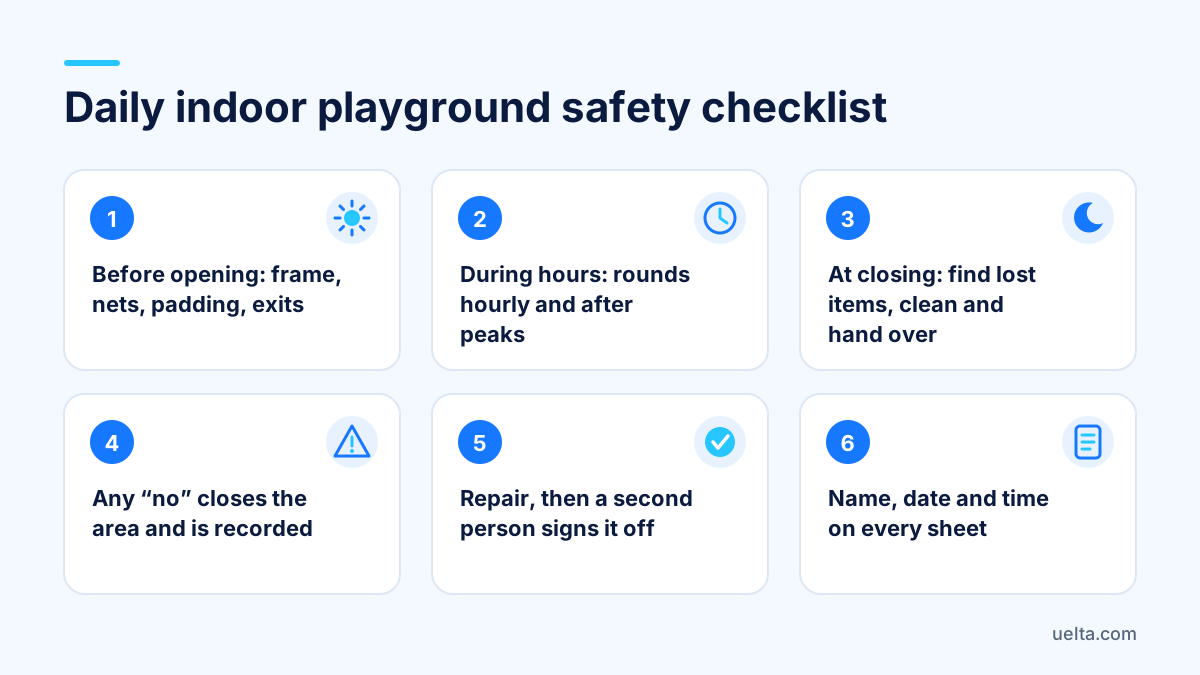
Below you will find the specific points for each part of the day, how to respond when something fails and the mistakes venues make most often. Adapt it to your own play frames, the manufacturer's instructions and the rules that apply to you.
How to build an indoor playground safety checklist that works
A useful checklist is not a long document nobody reads: it takes a few minutes to complete and forces people to actually look. Before writing the points, set these rules:
- One sheet per part of the day: opening, rounds and closing. Mix them and sections get skipped.
- Checkable points: “level two netting is taut with no holes” can be checked; “all fine” cannot.
- Yes/no with an action: every “no” records what was done (area closed, manager told, repair requested).
- Name, date and time: whoever checks signs. No name means, in practice, no check.
- Same route every time: from the entrance to the back and from the bottom up, so no corner is missed.
Soft play frames have their own technical requirements (in Europe, the EN 1176 series, which includes a part specifically for enclosed play equipment), and local rules may apply on top. Check with the manufacturer and your adviser which periodic inspections you need: the daily checklist complements them, it does not replace them.
Before opening: the morning inspection
This is the most important round, because it is done with the venue empty and every light on. Follow this order:
- Frame: joints, bolts and visible cable ties. Nothing loose, nothing sticking out, no exposed edges.
- Netting and mesh: no holes or cuts, taut and fixed at every point. Slack mesh is exactly where a child catches a foot.
- Padding: covers not torn, no foam showing, firmly fixed to posts and bars.
- Slides: no cracks or open seams, and a clear landing area.
- Ball pool: no broken or crushed balls and nothing foreign at the bottom (hair clips, coins, small toys).
- Floors: dry, nothing loose, mats butted together and lying flat.
- Toddler area: separated, gate closed, no equipment meant for older children inside.
- Evacuation: fire exits clear and opening, signs lit, extinguishers in place.
- First aid kit: complete, restocked, with emergency numbers on display.
- Cleaning and environment: touch points, toilets and baby changing clean; ventilation and temperature right.
If any point fails and affects safety, that area does not open. A closed section with a sign is far better than explaining yourself to a family after an accident.
During opening hours: rounds and floor control
Once the venue fills up, new risks appear: spills, objects carried into the frame, too many children in one spot or older children playing among toddlers. Set rounds at fixed times (for example every hour and after each arrival peak) and check:
- Load per area: children not bunching on slides, walkways or high levels.
- Age separation: older children kept out of the toddler area, age rules visible at each entry.
- Basic rules: socks on, no shoes or food inside the frame, nothing in pockets.
- Spills and mess: coned off, cleaned and noted straight away.
- Staffed positions: every zone covered, including during breaks and shift changes.
- Party rooms: a check between parties (furniture, sockets, leftover food) and attention to each group's allergies.
If you also have a jumping area or a tall drop slide, give it its own sheet with specific points (beds, springs, edge padding, usage rules), because its risks are different from those of the play frame.
At closing: leave the venue ready for tomorrow
Closing is when you spot the day's wear and tear and hand over to the next shift:
- Walk the frame looking for forgotten items, especially in tunnels and the ball pool.
- Clean and disinfect touch points, mats and the toddler area.
- Note any new damage, however small: an open seam today is a split cover next week.
- Make sure every incident from the day has a report and an owner.
- Write down what the opener should look at first tomorrow.
When something fails: act, record and never reopen blind
A checklist only works if every “no” triggers a clear action. This routine works in most venues:
- Close and cordon off the affected area immediately.
- Tell the duty manager, who decides whether it can be fixed that day.
- Record what was found, with photos, the time and who spotted it.
- Repair with the right part or material, following the manufacturer's guidance.
- Sign it off: a second person checks the repair before reopening.
Mistakes to avoid:
- Ticking everything at once at the end of the shift without walking the route.
- Copying a generic checklist that does not name your frames or zones.
- Patching something “temporarily” with tape and forgetting about it.
- Only one person knowing how to check: the day they are off, nobody does it properly.
- Keeping loose paper sheets, so you cannot see which area fails most often.
If a child is hurt, give first aid, inform the family and record what happened the same day. What to report and which records to keep is something to check with a legal adviser and your insurer.
Frequently asked questions
How often should an indoor playground be inspected?
Every day before opening, with rounds during opening hours and a check at closing. On top of that there are deeper periodic inspections that depend on the manufacturer and local rules, so confirm them with your adviser.
What should an indoor playground safety checklist include?
Frame and joints, netting, padding, slides, ball pool, floors, toddler area, fire exits, first aid kit and cleaning. Each point needs a yes/no, the action taken if it fails and the signature of the person checking, with date and time.
Who should carry out the daily safety check?
A trained, named person on each shift, not whoever arrives first. Ideally at least two people on the team know how to do it, to cover absences.
Is a signed waiver from parents enough?
No. A waiver informs families of the rules, but it does not replace inspections or maintenance. Its legal scope is something to review with an adviser.
Should I keep completed checklists?
It is strongly advisable to keep them with the date, time and person responsible, alongside incident reports and repairs. Confirm how long to keep them with your adviser and insurer.
How Uelta helps
Uelta does not walk the round for you, but it keeps everything that comes out of it organised:
- With internal operations, every “no” that affects safety becomes an incident report with photos, status notes, manager approval, customer signature and a PDF.
- Maintenance follows six steps (request, acceptance, approval, repair, sign-off and closure), with photos, costs, materials and the conversation for each repair, so the sign-off before reopening is on record.
- Customer complaints are logged in seconds with an owner, compensation and closure, and you can see which ones keep coming back.
- With staff and HR you publish your opening and closing procedure as a protocol, with attachments or video: the team reads and signs it on their phone and you see who is still missing.
- With digital waivers, parents sign for their children on their phone and the till shows reception who still needs to sign. In indoor playgrounds, capacity per zone and session also stops you selling more places than you have.
Try it with your own zones and play frames on the 7-day free trial.